[DRAC] Segfault with virtual console

Okay let be clear: i dislike Dell’s iDRAC. Sure unlike ILO there is no license to buy and the interface is pretty convenient, but why something as essential as the console access is so buggy and unreliable ?

Last example: no matter which version of Java i use on my Arch direct crash of the console at startup. After digging a little I luckily came across this link which explain everything and give this workaround :

zapan:~# vi /tmp/idracfix.c
#define _GNU_SOURCE

#include 
#include 
#include 

void *dlopen(const char *filename, int flags) {
    if (filename && !strcmp(filename, "/usr/lib/libssl.so"))
            return NULL;
    void *(*original_dlopen)(const char *, int);
    original_dlopen = dlsym(RTLD_NEXT, "dlopen");
    return (*original_dlopen)(filename, flags);
}

Compile it:

gcc -Wall -fPIC -shared -o idracfix.so idracfix.c -ldl

And for now launch javaws while setting LD_PRELOAD when using iDrac console :

LD_PRELOAD=./idracfix.so javaws viewer.jnlp

Mosh

I think no body reading this blog need an introduction to SSH, the standard of remote access terminal since the end of the 90’s. We all know and love this protocol, and its main implementation openssh. But sometimes SSH strict and clean design can be a pain in the ass. During my on-call duty i sometime have no other choice than to work using only a poor 3G/EDGE mobile access. High latency and intermittent connectivity don’t play well with SSH. Even with a GNU screen session on the remote server that never an enjoyable moment.

It’s in such situations that a tool like mosh become interesting.

What’s Mosh ?

Mosh stand for Mobile Shell. Like SSH that a remote-terminal protocol, but designed with mobile access in mind. It allows roaming, support intermittent connectivity, predictive echoing and local buffering for line typing/editing/deleting (yep openssh waits for the server’s reply before showing you your own typing, now you understand the typing latency). All of these features make it way more convenient to use on a high latency and/or unreliable links than a standard SSH session.

Installing Mosh

Mosh need to be installed on both the client and the server. For Debian, there is only one package simply call mosh. It’s available in the official repository since Debian Wheezy.

Using Mosh

It’s much simpler than what you think. Just type:

mosh username@server

and the mosh command will take care of everything. First it will log you using the ssh command, then start the mosh-daemon on the remote server. After that it close the ssh session and reconnect you to the mosh one. Note that by default the mosh-daemon chose a random UDP port between 60000 and 61000. If like me, you’re not a fan of subnet opening, you can use the -p parameter to force a specific port of your choice.

CLI file explorers

Ranger

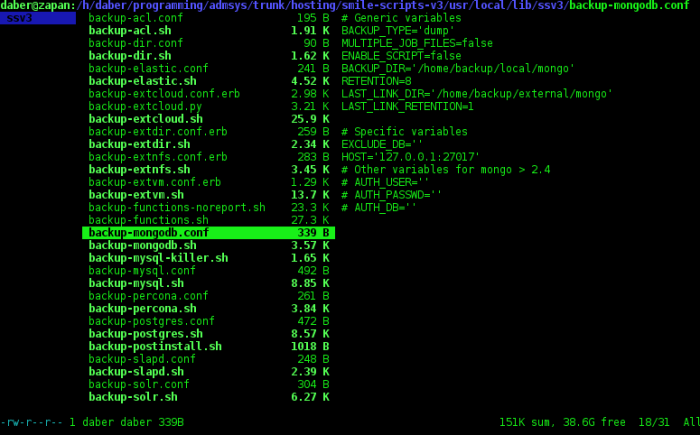
ranger is a console file manager with vi key bindings. It provides a minimalistic and nice curses interface with a view on the directory hierarchy (Miller column’s style).

Text files are displayed in a simple pager using less. Zipped files are automatically uncompressed and viewed in the same way. If you choose an image file, a preview will be displayed in colored ascii art.

Ranger uses many of the same keybindings as “vim”.
For instance, the movement commands mirror vim closely:

j = Move down
k = Move up
h = Move to parent directory
gg = Go to the top of the list
G = Go to the bottom of the list
-f = Page down
-b = Page up
J = Page down 1/2 page
K = Page up 1/2 page
H = Go back through navigation history
L = Go forward through navigation history

Last File Manager

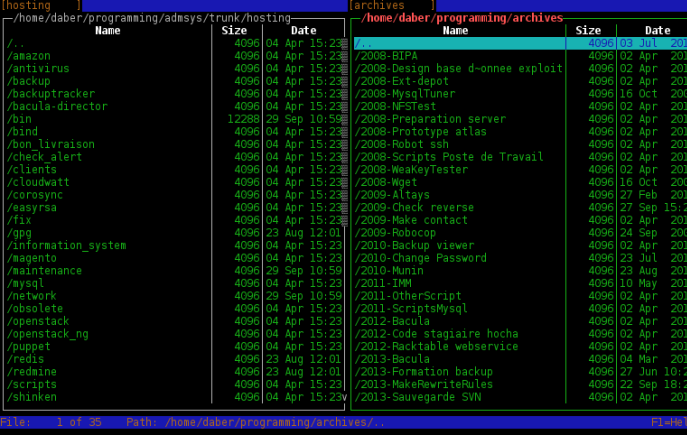
If you prefer a more ‘traditional’ way of browsing, you can try lfm. It’s a powerful ncurse file manager written in Python. It support 1-pane or 2-pane views, tabs, files filters, bookmarks, history and VFS support for compressed files.

Midnight Commander

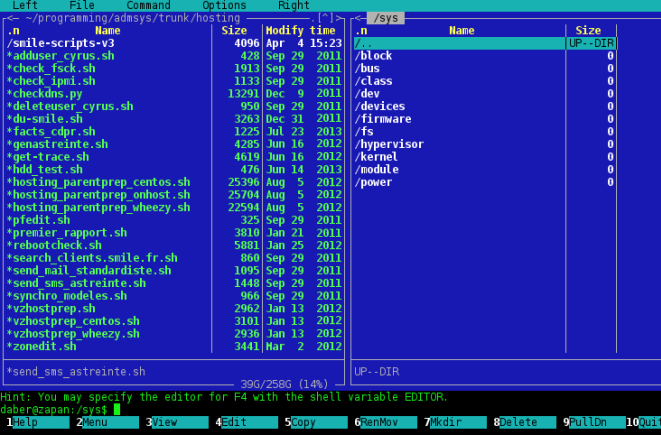
Midnight Commander is probably the most well-known application of this kind and probably the most easy to use due to being the closest to old and well know “Norton Commander”. In MC arrow keys control file selection, the insert key is used to select files and the Function Keys perform operations such as renaming, editing and copying files. It also supports mouse operations.

xdiskusage

xdiskusage is a graphical tool for displaying disk usage per directory. It’s kind of an ancestor to the more desktop oriented tool baobab and filelight.

One terrific feature for sysadmin of xdiskusage is that it can use a du output file as data source !

First generate an output file on the host to analyse (here foobar-host1) :

# du -ab * > du_foobar-host1.txt

rsync the du output file on your desktop machine, then make a:

# xdiskusage du_foobar-host1.txt

Parallel SSH

Parallel SSH is a useful tool designed to run a command on multiple servers in parallel. An advantage of PSSH over some alternatives (like DSH) is the manner outputs are stored: all outputs are sent to a folder containing an output file per server.

Using PSSH

First create your servers list, using the syntax host:port user :

vi /tmp/hosts_list.txt
server1
server2
server3:2222 foobar

Then create two directories: one for standard outputs, the second for error outputs.

mkdir /tmp/output
mkdir /tmp/error

Then execute your command:

parallel-ssh -h /tmp/hosts_list.txt -o /tmp/output/ -e /tmp/error/ uptime

Further Reading and sources

IPMI on dedibox server

Check if your hardware is compatible

Most middle and all high-end models are IPMI compatible. To check if your server is, log into the dedibox website then: Quick access -> Server selection -> Hardware -> IPMI information and configuration. If the hardware is compatible an IP is already assigned to the IPMI controller.

Into the Access list -> Add IP address you can modify the IPs authorized to connect to the IPMI controller. The modification isn’t taken into account immediately, so maybe you have to wait a couple of hours.

Dedibox configuration

Under Debian the ipmitools package provide the appropriate modules and tools to send and receive IPMI orders. But before using it you have to load two kernel modules:

# modprobe ipmi_si
# modprobe ipmi_devintf

Don’t forget to add them into the /etc/modules file.

Then you must create an IPMI user:

# ipmitool -U root user set name 8 foobar
# ipmitool -U root user set password 8 foofoo
# ipmitool -U root user enable 8

Test your setup

You can check your setup using a simple status command:

# ipmitool -I lanplus -U foobar -P foofoo -H XX.XX.XX.XX chassis status

Serial Over Lan

SOL is a useful feature that give you access to the server’s serial port over its IPMI network address. If you configure the server OS to have a tty on this physical interface, then you can do a lot of interesting stuff, like gathering data for troubleshoot a crashed server or live-checking the server boot process.

First modify the grub setting file /boot/grub/menu.lst and add BEFORE the “AUTOMAGIC KERNELS LIST” section this line:

serial --unit=0 --speed=9600 --word=8 --parity=no --stop=1
terminal --timeout=15 serial console

Then replace the line

# defoptions=quiet

by

# defoptions=quiet console=tty0 console=ttyS0,9600n8

Don’t forget to make an update-grub to apply the modifications.
Then modify the /etc/inittab file to add the serial interface to the getty entries:

T0:23:respawn:/sbin/getty -L ttyS0 9600 vt100

Reboot the server. Now that you have a working tty on the serial port you can enable SOL like this:

# ipmitool -I lanplus -U foobar -P foofoo -H XX.XX.XX.XX sol activate

Usefull IPMI commands

Here a short list of some of the most useful IPMI commands:

– Do a complete electrical reset (stop, wait the start):

# ipmitool -I lanplus -U foobar -P foofoo -H XX.XX.XX.XX chassis power cycle

– Do an hardware power reset:

# ipmitool -I lanplus -U foobar -P foofoo -H XX.XX.XX.XX chassis power reset

– Do an ACPI reset:

# ipmitool -I lanplus -U foobar -P foofoo -H XX.XX.XX.XX chassis  power soft

– Shutdown the server:

# ipmitool -I lanplus -U foobar -P foofoo -H XX.XX.XX.XX chassis  power off

– Start the server:

# ipmitool -I lanplus -U foobar -P foofoo -H XX.XX.XX.XX chassis  power on

– Get the server status:

# ipmitool -I lanplus -U foobar -P foofoo -H XX.XX.XX.XX chassis status

– Make an hardware self-check:

# ipmitool -I lanplus -U foobar -P foofoo -H XX.XX.XX.XX chassis selftest

Further Reading and sources

Memory scanner and editor

If you know the Windows program ‘ArtMoney’ you already have an idea what a memory scanner/editor like Scanmem could be used for.

For other people, basically this kind of tools allow you to search for variables in memory of a running process, generally using one initial value and then a second. When you have the precise offset, you can set the value as you wish (and then have a toon of money, lives or ammo).

This kind of tool could also be used to analyze an hostile process on a compromised machine but cheating in games is way more cool ^^

Sharing GNU sessions

GNU Screen have a very useful feature: sharing the same same session with multiple terminals.

Setting up a shared screen session

The following command sequence sets up a shared screen session named ‘shared’:

screen -d -m -S shared

Listing screen sessions

screen -ls
There is a screen on:
	8632.shared	(Detached)
1 Socket in /var/run/screen/S-pkb.

Attaching an existing session

screen -x shared


Doing the same… with different users

First the bad news : screen sharing with another account requires that the screen command be suid root. That a strong security risk so do it only if you are on a non-critical environment. When it’s done, simply start a new session as usual, then:

Enable multiuser support

Ctrl-A
:multiuser on

Add the user to join your session

Ctrl-A
:acladd foobar

Now the user foobar can join the session shared launched by the user user like this screen -x user/shared.

Optimize rdesktop connections

By default rdesktop try to give you the best image quality which is fine on a LAN but inappropriate in other case. But using some options you can change this behaviour:

  • -x disable theming
  • -m disable mouse motion events
  • -z to enable compression
  • -r soundff disable sound
  • -P enable bitmap caching

So now i use the following command:

rdesktop -u username -f -m -z -x m -P -r soundff -0 myip

[DRAC] Access through an SSH tunnel

In order to access to all DRAC features through an SSH Tunnel, you need to forward ports TCP 443, 5900 and 5901:

# sudo ssh -L 443:10.10.22.167:443 -L 5900:10.10.22.167:5900 -L 5901:10.10.22.167:5901 root@foobar_vm.foo.fr